The team over at Kodi have now released the well anticipated new version of Kodi called Kodi 19.5 Matrix.
STEP 1: IF YOU HAVEN’T ALREADY, PURCHASE AN AMAZON FIRE TV STICK
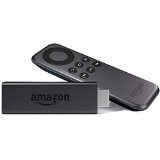
An Amazon Fire TV Stick is what we will be installing Kodi 19.5 Matrix onto to get all of our free channels, movies and sports etc. It is available from Amazon as well as many other online and local stores. To purchase an Amazon Fire TV Stick from Amazon, please Click Here.
The latest version available is called Kodi v19 “Matrix”and this is the very latest code of Kodi which is updated every single night.
STEP 2: SETTING UP THE AMAZON FIRESTICK READY FOR INSTALLATION
Getting Kodi 19 Matrix installed onto your Amazon Fire TV Stick may seem daunting at first, but you will most likely only need to do this once and you will then be setup with FREE, unlimited access to all premium channels.
To prepare your Fire Stick to install Kodi 19.5 Matrix, please do the following:
- Turn on your Amazon Fire TV Stick
- Select Settings
- Select System
- Select Developer Options
- Select Apps from Unknown Sources and turn ON & Select ADB Debugging & turn ON.
- You will be presented with a message regarding unknown sources.
- Simply click OK as this is needed to install Kodi 19.5 Matrix onto your Amazon Fire TV Stick.
STEP 2: INSTALLING ES FILE EXPLORER ONTO OUR AMAZON FIRE TV STICK WHICH WE WILL USE TO INSTALL Kodi 19.5 Matrix
To install Kodi 19.5 Marix on our Amazon Fire TV Stick we are going to be using an application called ES File Explorer.
To download and install ES File Explorer please do the following on your firestick:
- On the Fire Stick main menu, go to “Search“
- Type “ES Explorer” and hit enter.
- The first app to appear should have a blue icon, this is the ES File Explorer that we are looking for.
- Download and install the ES File Explorer.
- Once the ES File Explorer app has downloaded and installed please open it.
STEP 3: DOWNLOADING AND INSTALLING Kodi 19.5 MATRIX USING ES FILE EXPLORER
- Open ES File Explorer
- In the left sidebar of ES File Explorer, you will see “Favorites“, Expand the “Favorites” and click “Add“.
- Now you will be asked to enter a path and a name.
- Under path, type the following URL “http://www.kodi.tv“.
- You can name it anything you like for example “Kodi”.
- Now click “OK” and a bookmark will appear with the name you typed.
- Open the bookmark we just created.
- Navigate to the webpage using arrow keys on your Amazon Fire TV Remote.
- Select the “Download” button and click it.
- You will see many versions of KODI listed there,
- First click “Android”, this will open a popup box showing the current stable version of Kodi which is Kodi 17.6 Krypton.
- To get access to Kodi 19 Matrix click “Recommended”
- Now go down and select “INSTALLER (32BIT)“
- The download should now start automatically, if nothing happens, and that’s completely fine, please follow the next two sub-steps to solve it.
- Once you have clicked the “ARM” button, navigate to the “More” option which you will see in the lower right bottom of your screen.
- When you open “More“, select “Open in browser“.
- This will then start the Kodi 19 Matrix Application download on your Amazon Fire TV Stick.
- Once it has downloaded simply scroll over to Install and Kodi 19.5 Matrix will be installed.
STEP 4: LAUNCHING KODI 19 MATRIX ON YOUR AMAZON FIRE TV STICK
Now that Kodi 19 Matrix has been installed on to your Amazon Fire TV Stick it can be accessed/opened by going to:
Settings > Applications > Manage Installed Applications > Kodi > Launch Application
Once you have opened Kodi for the first time on your Amazon Fire TV Stick give it a minute or so to finish its initial loading, once that is done we are ready to start using Kodi 18 Leia on our Amazon Fire TV Stick!


